Welcome to RED-I’s documentation!
The project documentation is split into two sections
User Documentation
RED-I Project
Introduction
The REDCap Electronic Data Importer (RED-I) is a tool which is used to automate the process of loading clinical data from Electronic Medical Records (EMR) systems into REDCap Study data capture systems. RED-I is a general purpose tool for REDCap data importing suitable for use on any study in any REDCap system. It uses XML lookups to translate data stored in comma separated values (CSV) files and uploads it to a REDCAP Server using the REDCap API. The tool allows study data to be securely uploaded from clinical reporting systems, error checked, and uploaded into REDCap. It provides the investigator with feedback on upload success in the form of summary reporting of the data upload process.
You can view a presentation of the RED-I tool in action on youtube.
How to Install RED-I
RED-I is written in Python so you will have to install it if the following comand gives you an error:
$ python --version
Python 2.7.5
For more details on how to install python on your system please visit Downloading Python page.
Installation Using Source Code
We recommend to install RED-I in a Python virtual environment in order to prevent conflicts with your other packages.
   $ wget https://bootstrap.pypa.io/get-pip.py
   $ python get-pip.py
The follow steps assume that you have the git version control installed on your system.
   $ git clone https://github.com/ctsit/redi.git redi
   $ cd redi
   $ sudo pip install virtualenv
   $ virtualenv venv
   $ source venv/bin/activate
   $ make && make install
Once you are done with testing RED-I and you are satisfied with the results you can remove the virtualenv artifacts and install the RED-I package to be available system-wide.
   $ deactivate
   $ rm -rf venv/
   $ make && make install
Please refer to redi_installation document for more help with the installation.
Installation Using Binary Distribution
$ pip install redi
To uninstall the application:
$ pip uninstall redi
Installing RED-I on Windows
- Open a command prompt by clicking on the Start menu, and typing “cmd” in the Run box.
- Install 64-bit Python 2.7.9 by running the following command in the command prompt:
msiexec /i https://www.python.org/ftp/python/2.7.9/python-2.7.9.amd64.msi
- Next you need to be insure the command interpreter will be able to find the Python modules. Set
the paths to the modules by running the following commands in the command prompt:
   setx path "%path%;c:\python27"
   setx path "%path%;c:\python27\lib\site-packages"
   setx path "%path%;c:\python27\scripts”
- Make a new directory for the RED-I files by running the following command in the command prompt:
mkdir c:\redi
- Download the RED-I source code from: [https://github.com/ctsit/redi/archive/0.14.1.zip]
- Copy the contents of the RED-I zip file from c:Users%username%Downloadsredi-0.14.1redi-0.14.1 to c:redi
- Download the easy_install setup file from: https://bootstrap.pypa.io/ez_setup.py
- Run the easy_install setup file with the following command in the command prompt:
python c:\Users\%username%\Downloads\ez_setup.py
Note: you may need to modify the path to the ez_setup.py file if it is downloaded to a different location.
- Next, make a binary install of RED-I by running the following commands in the command prompt:
   cd c:\redi
   python c:\redi\setup.py bdist_egg
- You will need to manually install the pycrypto dependency. To avoid having to compile it with VCForPython you can
download a pre-compiled binary and install it with the following command:
c:\python27\scripts\easy_install http://www.voidspace.org.uk/python/pycrypto-2.6.1/pycrypto-2.6.1.win-amd64-py2.7.exe
- Finally, install your binary of RED-I with the following command:
c:\python27\scripts\easy_install.exe c:\redi\dist\redi-0.14.1-py2.7.egg
Installing RED-I on Red Hat and Fedora
Download and install setuptools. Setuptools will aid you in installing the redi package.
curl "https://bootstrap.pypa.io/get-pip.py" -o "get-pip.py" && sudo python get-pip.py
Note that you must have gcc (the Gnu Compiler Collection) to build RED-I. Check that you have gcc installed:
gcc --version
If gcc is not installed, install it:
sudo yum install gcc
Install the development libxslt, libxml2, and python-devel libraries. These allow you to build the redi source.
sudo yum install libxslt-devel libxml2-devel python-devel
Install redi using pip.
sudo pip install redi
RED-I is now be installed.
If you get an error message while compiling pycrypto, you will need to install pycrypto separately:
sudo yum install python-crypto
- To use the example config, documentation, and other associated RED-I files, you will need to get files from the GitHub repository. You have two options:
- Clone the repo by using Git.
yum install git
Set up your install of Git to use the key on your GitHub account. Instructions are at: https://help.github.com/articles/generating-ssh-keys/
Now, clone the redi git repo:
clone git@github.com:ctsit/redi.git
You now have a directory called redi with the source, docs, example configuration and other RED-I files.
- Download the zip file
wget https://github.com/ctsit/redi/archive/master.zip
sudo yum install unzip
unzip master.zip
- You now have a directory called redi-master with the source, docs, example configuration and other RED-I files.
How to Test RED-I with a Sample Project
Now that you installed the RED-I application you are probably wondering how to configure it to help you with data translation and import tasks. The good news is that you do not have to change any configuration file to test RED-I – we provide examples of working files for you:
Vagrantfile- –> allows to run a local REDCap instance
settings.ini- –> pre-configures RED-I to send data to the local REDCap instance
Makefile.ini- –> configures the make
tasks from
Makefileto simplify testing
redi_sample_project_v5.7.4.sql- –> provides the data for the sample project running in the local REDCap instance
These files make it very easy to see how RED-I imports data from a csv file into a local instance of REDCap. You just have to follow the instructions from the Testing RED-I with a sample REDCap Project document.
Note: You will need to obtain your own copy of the REDCap since the license terms prevent us from including the code in an open source project.
How to Configure RED-I for a New Project
To use RED-I in production you will have to edit the ‘settings.ini’ file with values matching your environment.
Please refer to the RED-I Configuration for more details about the meaning of each parameter in ‘settings.ini’ file.
Please refer to the Add new REDCap Project and API Key document for more details about new project setup.
One of the advantages of using RED-I is that it allows to be customized in order to send data to multiple types forms in REDCap projects. Please refer to Describing a REDCap Form to RED-I document for more details on how to create two of the required configuration files.
How to use RED-I
$ redi -c config-example
Please refer to the RED-I Usage for more details about all arguments supported in the command line.
How to Get Support
If you need any help with using RED-I please email us at ctsit@ctsi.ufl.edu
How to Contribute
- Fork the source-code
- Create a branch (git checkout -b my_branch)
- Commit your changes (git commit -am "Details about feature/bug fixes in the commit")
- Push to the branch (git push origin my_branch)
- Open a pull request and we will accept it as long as it conforms to our
RED-I Configuration
Required Parameters
The following parameters are required to have a value in settings.ini:
- raw_xml_file
- translation_table_file
- form_events_file
- research_id_to_redcap_id
- component_to_loinc_code_xml
If any of the parameters listed above is missing then the program will terminate. A detailed message about the missing parameter will be displayed to the user before the program terminates as well as written to the log file.
Conditional Parameters
While the parameters mentioned in the section above are always required, the following parameters are only required to have a value in settings.ini when redi is not performing a dry run.
- redcap_uri
- token
- redcap_support_receiver_email
- redcap_support_sender_email
- smtp_host_for_outbound_mail
- smtp_port_for_outbound_mail
- sender_email (only required when **send_email* is set to Y)*
- receiver_email (only required when **send_email* is set to Y)*
Note: In “dry run” mode the RED-I will not send any data to REDCap.
The following parameters are required only when --emrdata is
specified on the command line:
- emr_sftp_server_hostname
- emr_sftp_server_username
- emr_sftp_server_password
- emr_sftp_project_name
- emr_data_file
These parameters are essential for establishing a connection with the SFTP server to obtain EMR data; so, if they are missing or do not have a value in settings.ini, then the program will terminate. As with the required parameters, a message about this will be displayed to the user before the program terminates as well as written to the log file.
Optional Parameters
Following parameters in settings.ini are optional:
| Parameter Name | Default Value |
|---|---|
| report_file_path | report.xml |
| report_file_path2 | report.html |
| input_date_format | %Y-%m-%d %H:%M:%S |
| output_date_format | %Y-%m-%d |
| project | DEFAULT_PROJECT |
| rate_limiter | 600 |
| batch_warning_days | 13 |
If the above parameters are missing or do not have a value in settings.ini then the corresponding default value is used. Whenever a default value is used, a message about is written to the log file.
RED-I Usage
Currently the RED-I application can be only executed from the command line:
$ redi
Optional command-line arguments:
- -h, –help: show the help message
- -v, –verbose: increase verbosity of output
$ redi -v
- -V, –version: Show version number
$ redi -V
-c: Specify the path to the configuration folder.
$ redi -c /Users/admin/redi-config
Default path for config folder is /config. For “data directory” refer –datadir.
-k, –keep: Prevents deletion of the output files generated during data processing.
$ redi -k
When this parameter is provided, the output files are stored in /out/out_<timestamp>.
The timestamp has the format: YYYY_MM_DD-HH_MM_SS.
If the parameter is not provided, the output files are stored in a temporary folder during the execution of redi and then deleted along with the temporary folder once redi finishes execution.
-d, –dryrun : Performs a dry run.
$ redi --dryrun
When this parameter is provided, all data transformations are performed and execution stops after writing out the final data set to /out/out_<timestamp>.
The purpose of this switch is to assist developers in performing a dry run of
redi. Data will not be written to the REDCap server nor will emails be sent.If
-dis used,--keepis implied; therefore, you do not need to specify it or provide any path for storing the output files.By default, this parameter is disabled.
-e, –emrdata: Runs the script for fetching EMR data.
$ redi --emrdata
When this parameter us provided, a connection will be established with the sftp server mentioned in the settings.ini file in the config folder and EMR data required for the execution of redi will be downloaded.
Following parameters need to be set in config/settings.ini before using this option:
- emr_sftp_server_hostname = URL of the SFTP Server
- emr_sftp_server_username
- emr_sftp_server_password
- emr_sftp_project_name = folder on the SFTP server containing the EMR data
- emr_data_file = file containing the EMR data
By default, this parameter is disabled.
-r, –resume: Resumes a previously stopped run of
redi.*WARNING!!!* This is used in a very specific case. Use with caution.
Once redi has completed processing, it sends its data to configured REDCap Server. Each transaction is initially marked as unsent and only after a response from the REDCap Server is it changed to sent. If you stop redi from running during this time, it is possible to resume where it left off by specifying the
--resumeswitch.Do not use
--resumefor a first run; it will fail. Using--resumeonce a run has completed is unsupported, but won’t do much other than send the email the report again.The development team is looking to make this a more robust and safer feature in the future.
–datadir: Specify path to the data directory
$ redi –datadir /Users/admin/redi_output
The data directory is the directory that will store the following:
- log file. Currently up to 31 days of logs are stored, after which the file begins rotating.
- SQLite database used for storing checksums
- intermediate output files which are required for debugging and used by the resume logic
- configuration directory (unless a different path for this is specified by the user)
By default, the data directory is assumed to be the current working directory. Using this switch, one can run multiple instances of redi simultaneously.
–skip-blanks: skip blank events when sending event data to RedCAP
$ redi –skip-blanks
Add new REDCap Project and API Key
Steps
Once you have the RED-I configuration ready you can create a new REDCap project
Note: The instructions below assume you have the permissions to create a new REDCap project, create a user, set user permissions, and create an API Token. Depending on how your REDCap server is configured you may or may not have the permissions to do these tasks yourself. Please consult with your local REDCap managers for assistance if you do not see these options.
1. Create new Project
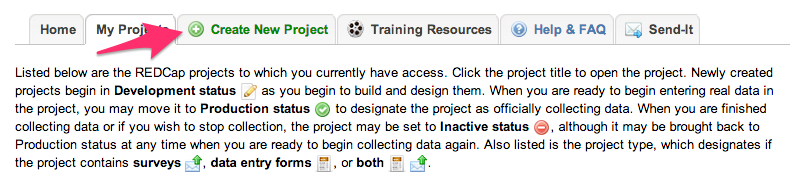
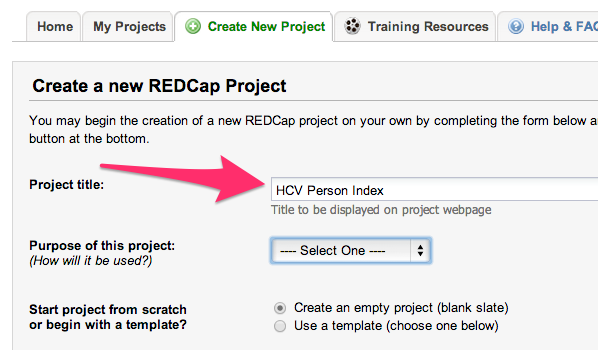
Open in the browser the REDCap url. Select the Create New Project
tab. Enter <your_project_name> for the project title. Please check
below images for reference.
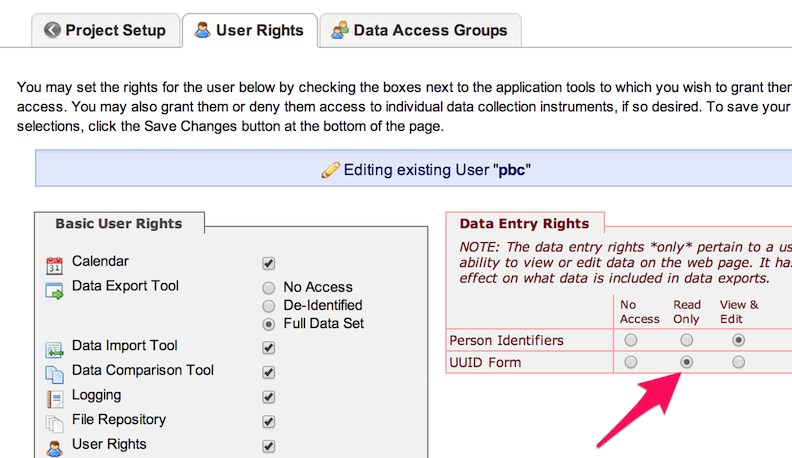
2. Authorize People
To adjust user rights, access the User Rights tool via the menu on the left side of the REDCap screen.
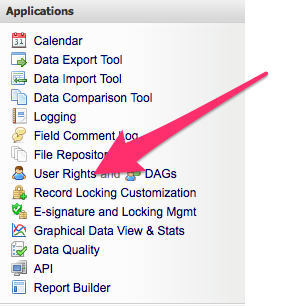
or click on User Rights button in the Project Setup
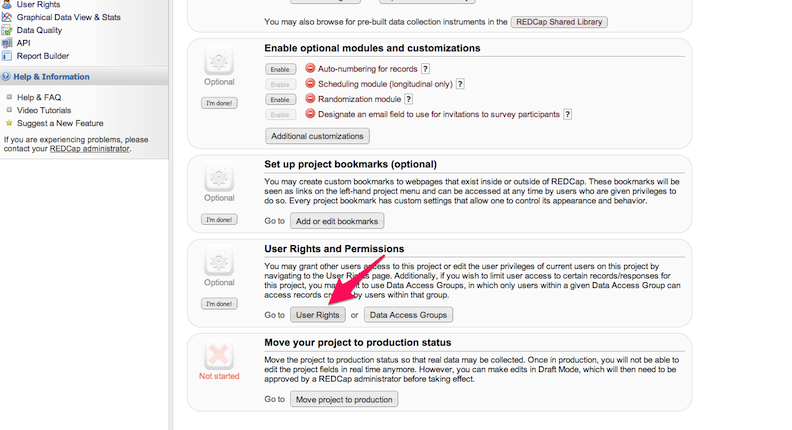
In REDCap User Rights, set Data Entry Rights as per your
needs.Please check below image
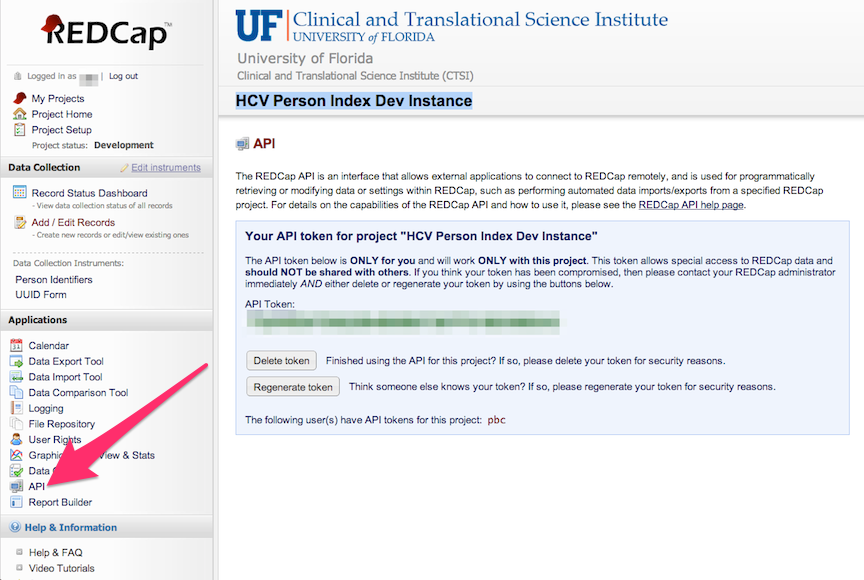
3. Create an API Token
For the data in your project to be used by programs, those programs will need access through API interface. You will need to create an API Token to allow those programs to authenticate and get the correct permissions on your project.
This token can be created on any account, but for automated processes a service account will provide a more reliable authentication. Add a user in this REDCap project with the permissions shown below:
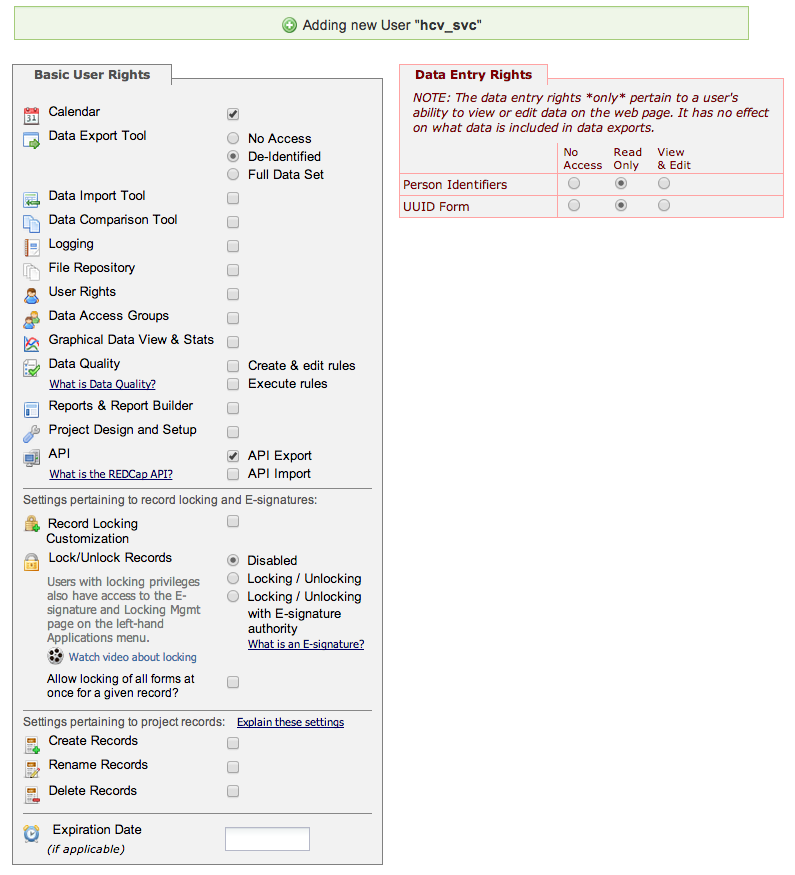
After you have created the new user, login as that user and request an Read-only API button on the left hand toolbar.
4. Export Data
If you have data in this project that needs to be preserved, you can
export it using the steps listed in the section 2 above.
5. Backup Data
If you would like to backup this project along with other REDCap
projects, please follow the procedures listed in the section 3. If
you want to initialize the project with no data in it, follow the
procedures in section 2.
6. Document the Existence of the Project
Please update the README-projects.md document with a detailed decription of the new project.
Clinical Data Specification
Clinical data from an Epic Clarity system should conform to this specification. The specification was designed to adhere to default Epic Clarity field names and data formats wherever possible.
- All data will be returned in the UTF8 Character set
- The first row of the file will be a header row showing the name of each column, enclosed in double quotes and separated by commas.
- The field names in the header row will be those shown below. The case of each column name should be that shown below.
- Subsequent rows will show lab result values. All values will be enclosed in double quotes and separated by commas.
- Each row will show one lab result value.
These fields may be specified in the data file:
Field Name      Field Required?  Field Description
STUDY_ID            yes          Identifier of a person within a study
NAME                yes          Name of lab component
COMPONENT_ID        yes          Numeric identifier of lab component
ORD_VALUE           yes          Result value for lab component
REFERENCE_LOW       no           Lowest expected value for ORD_VALUE
REFERENCE_HIGH      no           Highest expected value for ORD_VALUE
REFERENCE_UNIT      yes          Units for ORD_VALUE
SPECIMN_TAKEN_TIME  yes          Date and time specimen was taken from the patient/study subject. Date must be formatted as "YYYY-MM-DD HH:MM:SS".
Describing a REDCap Form to RED-I
RED-I needs to know certain information about REDCap forms and events so that it can correctly translate and insert clinical data into them.
The description of the forms is done in two XML files called `Form
Events <#form-events>`__ and `Translation
Table <#translation-table>`__. The location of these files is
specified in the settings.ini configuration file.
*See:* How to Add a Simple REDCap Form to RED-I
Form Events
- Format: XML
- Configuration:
- Key: form_events_file
- Default: formEvents.xml
Sample
<?xml version="1.0" encoding="UTF-8"?>
<redcapProject>
    <name>Project</name>
    <form>
        <name>cbc</name>

        <formDateField>cbc_date</formDateField>

        <formCompletedFieldName>cbc_done</formCompletedFieldName>
        <formCompletedFieldValue>2</formCompletedFieldValue>

        <formImportedFieldName>cbc_imported</formImportedFieldName>
        <formImportedFieldValue>Y</formImportedFieldValue>

        <event>
            <name>1_arm_1</name>
        </event>
        <event>
            <name>2_arm_1</name>
        </event>
    </form>
</redcapProject>
Root Element
Form Elements
The follow are children elements of each redcap/form element.
Event Elements
The following are children elements of each redcap/form/event
element.
| Required? | Name or Path | Description | Max |
|---|---|---|---|
| Required | name |
Name of the REDCap Event | 1 |
Translation Table
- Format: XML
- Configuration:
- Key: translation_table_file
- Default: translationTable.xml
Sample
<rediFieldMap>

    <clinicalComponent>
        <loinc_code>34714-6</loinc_code>
        <clinicalComponentName>INR</clinicalComponentName>

        <redcapFormName>inr</redcapFormName>

        <redcapFieldNameValue>inr_lab_result</redcapFieldNameValue>
        <redcapFieldNameValueDescriptiveText>INR</redcapFieldNameValueDescriptiveText>

        <redcapStatusFieldName>inr_lab_status</redcapStatusFieldName>
        <redcapStatusFieldValue>NOT_DONE</redcapStatusFieldValue>
    </clinicalComponent>

    <clinicalComponent>
        <loinc_code>11011-4</loinc_code>
        <clinicalComponentName>Hepatitis C virus RNA</clinicalComponentName>

        <redcapFormName>hcv_rna</redcapFormName>

        <redcapFieldNameValue>hcv_lab_result</redcapFieldNameValue>
        <redcapFieldNameUnits>hcv_lab_result_units</redcapFieldNameUnits>
        <redcapFieldNameValueDescriptiveText>HCV RNA results</redcapFieldNameValueDescriptiveText>
    </clinicalComponent>

</rediFieldMap>
Clinical Components
Clinical Component is a generic term for test, measurement, or
observation. Each Clinical Component is represented by a
clinicalComponent XML element whose children elements are as
follows:
How to Add a Simple REDCap Form to RED-I
Remember, when “adding a form” you are describing it to RED-I. So, you can open your browser and use the actual REDCap Form to guide you.
- Edit
formEvents.xml - Copy the contents of the sample data for a
formelement. - Replace the text of all XML Elements using the descriptions above.
- Edit
translationTable.xml - Copy the contents of the sample data for a
clinicalComponentelement - Replace the text of all XML Elements using the descriptions above.
- Repeat for as many clinical components as needed.
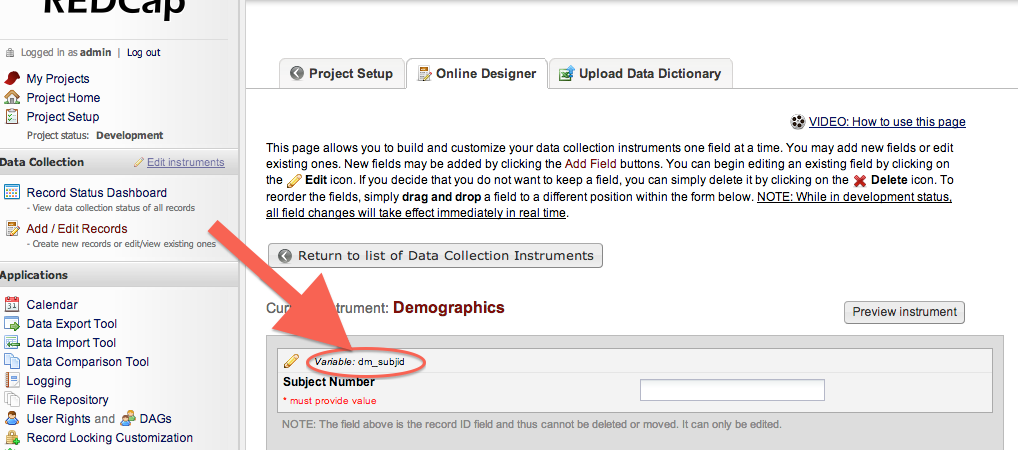
Note
You can lookup a field’s ID using REDCap’s Data Collection Instruments editor.
- Click Project Setup
- Under Design your data collection instruments, click Online Designer.
- Find the name of your form (called an Instrument), such as “Demographics”.
- Find the field you are looking for and copy it’s Variable name.
Mapping Clinical Components to LOINC Codes
This document explains how to lookup LOINC Codes and map them to a site’s local clinical components for RED-I to use.
Lookup LOINC Codes
- Download the LOINC Table File and open it in your preferred Spreadsheet Viewer.
- Find the columns LONG_COMMON_NAME and COMMON_TEST_RANK.
- Filter the LONG_COMMON_NAME by the name of your clinical component.
- Sort COMMON_TEST_RANK descendingly. This column ranks the top 2000 components from most common (ranked 1) to least common (ranked 2000), as described on the LOINC usage site. Unless you are mapping specialized data, it is more likely that the component of interest is ranked more highly, i.e., it is more common.
- Starting with the highest rank, use LOINC Search to investigate each Component until you’ve found the one you’re looking for.
Map Local ID to LOINC Code
Mapping is done in an XML document; a sample of a mapping file and an explaination of the format is as follows.
- Format: XML
- settings.ini configuration:
- Key: component_to_loinc_code_xml
- Default: clinical-component-to-loinc.xml
Sample
<?xml version='1.0' encoding='US-ASCII'?>
<clinical_datum>
<version>0.1.0</version>
<Description>
Mapping of the University Hospital's Lab Component Identifiers to corresponding LOINC codes
</Description>
<components>
<component>
<description>Leukocytes [#/volume] in Blood</description>
<source>
<name>COMPONENT_ID</name>
<value>8675309</value>
</source>
<target>
<name>loinc_code</name>
<value>26464-8</value>
</target>
</component>
<component>
<description>Hepatitis C virus RNA [#/volume]</description>
<source>
<name>COMPONENT_ID</name>
<value>42</value>
</source>
<target>
<name>loinc_code</name>
<value>26464-8</value>
</target>
</component>
</components>
</clinical_datum>
Clinical Datum
The root element MUST be clinical_datum.
| Required? | Name or Path | Description | Max | Notes |
|---|---|---|---|---|
| Optional | version |
Version number of the Clinical Datum XML format. | 1 | 0.1.0 is currently the only version |
| Optional | Description |
Description of the XML document | 1 | Potentially helpful to readers |
| Required | components |
The parent element for Clinical Components Mappings | 1 |
Clinical Component Mapping
Represented as component elements under
clinical_datum/components. Each component represents a mapping from
a (clinical component) Source to a Target (LOINC code). Source comprises
an XML Element name and value; likewise, Target comprises the name and
values to use as a replacement.
For every incoming clinical component that will be mapped to a LOINC value, create a new block and complete it according to the below table.
| Required? | Name or Path | Description | Max | Notes |
|---|---|---|---|---|
| Optional | Description |
Description of the Component | 1 | Potentially helpful to readers |
| Required | source |
Parent element for the Source information | 1 | |
| Required | source/name |
Name of the XML Element | 1 | |
| Required | source/value |
Value of the XML Element | 1 | |
| Required | target |
Parent element for the Target information | 1 | |
| Required | source/name |
Name of the XML Element | 1 | |
| Required | source/value |
Value of the XML Element | 1 |
Example
Given the sample above, the following input:
<COMPONENT_ID>8675309</COMPONENT_ID>
would be mapped to:
<loinc_code>26464-8</loinc_code>
Developer Documentation
Testing RED-I with a sample REDCap Project
Purpose
The “vagrant” folder was created with the goal of making testing RED-I software as easy as possible. It contains the Vagrantfile which allows you to start a virtual machine capable of running the REDCap software – which means that during virtual machine creation the Apache and MySQL software is installed without any user intervention.
There are a few important things to note before proceeding with running RED-I to import data into a sample REDCap project:
- You have to install the vagrant and virtual box software
- You have to obtain the closed-source REDCap software from http://project-redcap.org/
- You have to obtain a Makefile.ini file in order to be able to execute tasks from the Makefile
Steps
1. Install vagrant and virtual box
On a linux machine run:
- sudo apt-get install vagrant
- sudo apt-get install virtualbox
On a mac machine:
- Download and install vagrant from https://www.vagrantup.com/downloads.html
- Download and install the latest virtual box from http://download.virtualbox.org/virtualbox/
For more details about Vagrant software you can go to why-vagrant page.
2. Configure the VM
As mentioned above you have to obtain a copy of the REDCap software from http://project-redcap.org/ and save it as “redcap.zip” file in the “config-example/vagrant-data” folder. This ensures that in the later steps the bootstrap.sh script can extract the files to the virtual machine path “/var/www/redcap”.
Now execute the following commands to complete the configuration:
cd ./vagrant    # must be in the redi/vagrant/ directory
make copy_config_example
make copy_redcap_code
make copy_project_data
make show_config
Please verify that the output from “show_config” matches your expectations.
3. Start the VM
To use the vagrant VM you will need to install Vagrant and Virtual Box.
With these packages installed, follow this procedure to use a VM template:
# must be in the redi/vagrant/ directory
cd ./vagrant
vagrant up
Vagrant will instantiate and provision the new VM. The REDCap web application should be accessible in the browser at
If port 8998 is already in use vagrant will choose a different port automatically. Read the log of “vagrant up” and note the port to be used.
4. Verify the VM is running
Verify that the virtual machine is working properly by accessing it using:
vagrant ssh
5. Import Enrollment Data using RED-I
Import the sample subject list into REDCap by executing:
make rc_enrollment
Note: This step is necessary because in order to associate data with subjects the list of subjects needs to exist in the REDCap database.
6. Import Electronic Health Records using RED-I
Import the sample electronic health records into REDCap by executing:
make rc_post
Verify that the output of this command ends with:
You can review the summary report by opening: report.html in your browser
If this step succeded you have verified that RED-I can be used to save time by automating EHR data imports into REDCap.
Congratulations! You can now add your own REDCap project and start using RED-I to move data. Please refer to Add new REDCap Project and API Key document for help.
Code Review Checklist
When reviewing a pull request there are many quality checks we could perform. This document can serve as a guide for tests we can apply to assess the quality of the work.
- Is the pull request against the right branch? Changes without dependencies should be forked from the head of the *master* and merged back to *develop*. Changes with dependencies should fork from and merge back to a non-production branch, generally *develop*.
- Does the pull request contain one and only one thing be it a new feature, bug fix, refactor, etc. ?
- Do the commit(s) in the request describe the work?
- Does the pull request comment describe the work?
- Does the pull request pass the Travis tests?
- Do new tests accompany any new code?
- If this is a bug fix, is a test added to test for that bug?
- If this is a new feature, is it documented?
- Does the new code improve or maintain the lint score?
- Does the new code improve or maintain the code coverage score?
- If the new code contains changes that would break existing installations (e.g. database schema, configuration file changes), does it also contain relevant documentation of the change? Does it have a migration procedure? Does it have a migration tool?
- Does the merged code pass an integration test?
Setting up Travis CI for Open Source REDI project
Steps to setup Travis CI for RED-I
- Sign in to travis using Github account (ctsit)
- Give permissions to travis to clone and sync github repositories when asked.
- Activate a webhook on the repo on your choice
- Go to repositories in your profile (Click on your profile as shown below)
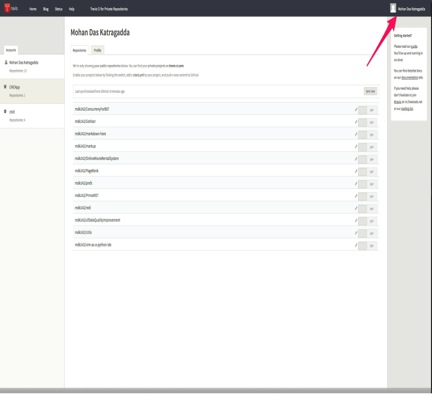
image
- Flip the switch against the repo of your choice to enable webhook for
that repo as displayed in the image below.
- Create a .travis.yml file and add it to your repository. I have created a basic .travis.yml, which work for current REDI. Below are its contents
language: python
python:
  - "2.7"
before_install:
  sudo apt-get install -y python-setuptools libxml2 libxslt1-dev python-dev
install:
  - pip install requests
  - pip install lxml
  - pip install appdirs

script: make test

branches:
  only:
    - master
    - develop
- The contents listed above are pretty basic. For any additional features you need to configure refer this link.
- Travis is now configured to your repository. For each new commit made to the master branch, travis will run new build for your repository and results will be mailed to the email registered in your github account.
- You can also view results on your Travis dashboard as shown in the
below image.
CTS-IT Responsibilities when a pull request is submitted on REDI
- When REDI gets a pull request, CTS-IT coordinator should open the pull request. This initiates Travis to run tests against pull request and displays the results.
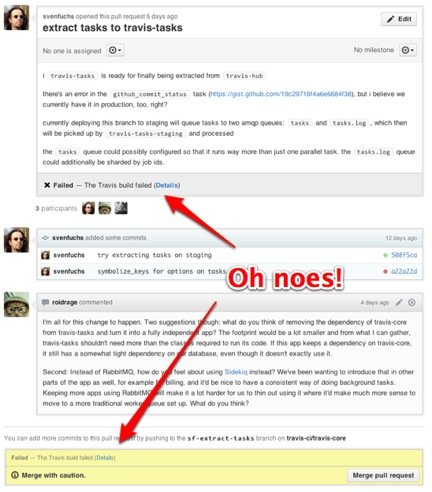
- Pull requests that passed the tests looks like as shown in the image.
- Pull requests that failed the tests looks like as shown in the image
below.
Responsibilities of the developer submitting a pull request:
- Fork the REDI repository. You will get a .travis.yml with the fork.
- Setup a travis account for your github account and give permissions for travis to run build.
- With this you should receive travis reports for each commit you push to your forked repository.
- Before submitting a pull request, make sure tests in your travis report are all passing.
Regression Testing
The intent of the procedure described below is to find new bugs or unexpected side effects in the code after a release lifecycle is completed.
Goal: Compare two files obtained from RedCAP after two separate
imports are performed using the production and the candidate versions of
REDI software.
Note: The login credentials for the RedCAP web application on the
testing VM at http://localhost:8998/redcap/index.php are:
admin/password
Steps
Obtain the candidate version (redi_B) of the software
$ git clone git@repo_redi redi_new
$ cd redi_new && git checkout develop
Clone the config repository at ./config and checkout the tag that matched the REDI version
git clone git@repo_config config cd config && git checkout develop
If needed, revise the settings.ini lines that identify the host and authorize access. For this VM, the lines are
"redcap_uri": "http://localhost:8998/redcap/api/",
"token": "121212",

$ sed -i 's/^\s\+"redcap_uri.*/\t"redcap_uri" : "http:\/\/localhost:8998\/redcap\/api\/",/' settings.ini
$ sed -i 's/^\s\+"token.*/\t"token" : "121212",/' settings.ini
Go to the vagrant folder and remove the old virtual machine (VM) instance if necessary:
$ cd vagrant && vagrant destroy
Start a fresh VM:
$ vagrant up
The expected output from this command should look like:
redcap.zip content indicates Redcap version: 5.7.4
Setting the connection variables in: /var/www/redcap/database.php
Checking if redcap application is running...
   <b>Welcome to REDCap!</b>
If you need to preserve the database state then you can create a backup of the REDCap database before we insert any data by running the redcapdbm.php script on the VM:
$ vagrant ssh -c ‘cd /vagrant/scripts && php redcapdbm.php -b’
Note: The commands above create a file like
backup-redcap-YYYYmmdd-HHMM.sql on the VM
Erase the data in the REDCap instance using redcapdbm.php. First, enumerate the REDCap projects
$ vagrant ssh -c ‘cd /vagrant/scripts && php redcapdbm.php -l’
The following projects are currently available in the redcap database:
project_id: 1, project_name: redcap_demo_cda700 project_id: 2, project_name: redcap_demo_f3746b project_id: 3, project_name: redcap_demo_117155 … project_id: 12, project_name: hcvtarget_20_development …
Erase the data in the correct project if necessary:
$ cd ../vagrant && vagrant ssh -c 'cd /vagrant/scripts && php redcapdbm.php -d 12'

 Deleting data for project: 12, name: hcvtarget_20_development
 Rows deleted from `redcap_surveys_response`:0
 Rows deleted from `redcap_surveys_participants`:0
 Rows deleted from `redcap_surveys_emails`:0
If needed, load a minimal set of data to get research identifiers into REDCap. Use the redcap_records utility to load this data.
$ redcap_records --token=121212 --url=http://localhost:8998/redcap/api/ -i demographic_test_data.csv
On success the following text is returned:
{u'count': 5}
Upload raw.txt file to REDCap using redi_B
Note: You may want to increase the number of requests allowed for processing before proceeding with data upload.
Open the address "localhost:8998" using your browser

Login to REDCap and then click on "Control Center" tab

Click on the "Security & Authentication Configuration" link on the left menu

Find and adjust the "Rate Limiter" field to something like 60000


$ python ../redi/redi.py
If the output from the command above produces an exception then check if
your IP was not banned due to numerous requests sent (@see related code
in Config/init_functions.php: checkBannedIp() and storeHashedIp())
select * from redcap_ip_banned where ip = '10.0.2.2';
+----------+---------------------+
| ip       | time_of_ban         |
+----------+---------------------+
| 10.0.2.2 | 2014-06-06 18:59:25 |
+----------+---------------------+
To fix this, use these SQL commands:
update redcap_config set value = 600000 where field_name = 'page_hit_threshold_per_minute';
delete from redcap_ip_banned;
If the token is invalid the following error is returned:
Cannot connect to project at http://localhost:8998/redcap/api/ with token 121212
Download relevant forms from REDCap using a command like:
$ redcap_records --token=121212 --url=http://localhost:8998/redcap/api/ -f "demgraphics chemistry" > output_B.csv
If you have a lot of forms, the output comparison is easier if you export the forms separately like this:
#!/bin/bash

batch=$1
forms="demographics chemistry cbc inr hcv_rna_results"
if [ ! -e $batch ]; then
    mkdir $batch
fi

for form in $forms
    do
      redcap_records --token=121212 --url=http://localhost:8998/redcap/api/ --forms=$form > $batch/$form.csv
    done
Later do the diff like this:
diff -ur a/ b/
At this point we have gathered the output from the release candidate software redi_B. If we there is reference output file available than we can just compare the outputs:
$ diff -u output_A.csv output_B.csv
If there is no reference output file available than we have to get a previous version redi_A and generate it.
Erase the REDCap data first:
cd ../vagrant && vagrant ssh -c 'cd /vagrant/scripts && php redcapdbm.php -d 12'
Obtain the reference version (redi_A) of redi software.
$ git clone git@repo_redi redi_old
$ cd redi_old && git checkout TAG_ID_OLD

$ git clone git@repo_config config
$ cd ../config && git checkout TAG_ID_OLD_CONFIG
Repeat steps 8-10 with redi_A software with the only difference being that the output file is changed to
output_A.csvon step 10.Compare the files
output_A.csvandoutput_B.csvto insure there are no differences or expected differences are present:$ diff -u output_A.csv output_B.csv
If no new behavior was introduced the output from the command above should be an empty string.
redi
redi package
Subpackages
redi.utils package
This module is used to connect to an sftp server and retrieve the raw EMR file to be used as input for RED-I.
-
class
redi.utils.GetEmrData.EmrFileAccessDetails(emr_sftp_project_name, emr_download_list, emr_host, emr_username, emr_password, emr_port, emr_private_key, emr_private_key_pass)[source]¶ Bases:
objectEncapsulate the settings used to retrieve the EMR source file using an SFTP connection @see redi#_run()
SimpleConfigParser
Simple configuration file parser: Python module to parse configuration files without sections. Based on ConfigParser from the standard library.
Author: Philippe Lagadec
Project website: http://www.decalage.info/python/configparser
Inspired from an idea posted by Fredrik Lundh: http://mail.python.org/pipermail/python-dev/2002-November/029987.html
Usage: see end of source code and http://docs.python.org/library/configparser.html
-
class
redi.utils.SimpleConfigParser.SimpleConfigParser(defaults=None, dict_type=<class 'collections.OrderedDict'>, allow_no_value=False)[source]¶ Bases:
ConfigParser.RawConfigParserSimple configuration file parser: based on ConfigParser from the standard library, slightly modified to parse configuration files without sections.
Inspired from an idea posted by Fredrik Lundh: http://mail.python.org/pipermail/python-dev/2002-November/029987.html
-
class
redi.utils.redcapClient.RedcapClient(redcap_uri, token, verify_ssl=True)[source]¶ Bases:
objectClient for a REDCap server.
Parameters: - redcap_uri – URI for to REDCap server’s API
- token – API Token for a REDCap project.
- verify_ssl – verify the SSL certificate? (default: True)
Raises: - RedcapError – if we failed to get the project’s metadata
- RequestException – if some other network-related failure occurs
-
get_data_from_redcap(records_to_fetch=None, events_to_fetch=None, fields_to_fetch=None, forms_to_fetch=None, return_format='xml')[source]¶ Exports REDCap records.
Parameters: - records_to_fetch (list or None) – if specified, only includes records in this list. Otherwise, includes all records.
- events_to_fetch (list or None) – if specified, only includes events in this list. Otherwise, includes all events.
- fields_to_fetch (list or None) – if specified, only includes fields in this list. Otherwise, includes all fields
- forms_to_fetch (list or None) – if specified, only includes forms in this list. Otherwise, includes all forms.
- return_format – specifies the format of the REDCap response (default: xml)
Returns: response
-
send_data_to_redcap(data, max_retry_count, overwrite=False, retry_count=0)[source]¶ Sends records to REDCap.
Parameters: - of dict objects data (list) – records to send.
- overwrite (bool) – treat blank values as intentional? (default: False) When sending a record, if a field is blank, by default REDCap will not overwrite any existing value with a blank.
Returns: response
Raises: RedcapError – if failed to send records for any reason.
- :If MaxRetryError is caught, the function will try resending the same
- data for a maximum of max_retry_count times before exitting. For each attempt the wait time before sending is (the_attempt_no * 6)
-
redi.utils.redi_email.add_attachment(msg, body)[source]¶ Add the html report as attachment
- msg : MIMEMultipart
- The object to which we attach the body content
- body : string
- The html content to be attached
-
redi.utils.redi_email.send_email(host, port, sender, to_addr_list, cc_addr_list, subject, msg_body)[source]¶ The email deliverer. Return True if the email was sent
- to_addr_list : list
- The recipients of the email
-
redi.utils.redi_email.send_email_data_import_completed(email_settings, body='')[source]¶ Email the html report after redi completed the data transfer Returns a dictionary, with one entry for each recipient that was refused
- email_settings : dict
- Email params produced by redi.get_email_settings()
- body : string
- The html content produced by transforming the xsl generated by redi.create_summary_report()
-
redi.utils.redi_email.send_email_input_data_unchanged(email_settings, raw_xml)[source]¶ Send a warning email to the redcap_support_receiver_email if the input file did not change for more than batch_warning_days Return True if the email was sent
- email_settings : dictionary
- The email delivery parameters
- raw_xml : RawXml instance
- The object storing details about the input file
-
redi.utils.redi_email.send_email_redcap_connection_error(email_settings, subject='', msg='')[source]¶ Return True if the email was sent. Notify the designated REDCap support person about problems with reaching REDCap
- email_settings : dict
- The dictionary with smtp server parameters
- subject : str
- The email subject
- msg : str
- The content to be emailed
Utility module for throttling calls to a function
-
class
redi.utils.throttle.Throttle(function, max_calls, interval_in_seconds=60)[source]¶ Bases:
objectLimits the number of calls to a function to a given rate.
The rate limit is equal to the max_calls over the interval_in_seconds.
Parameters: - function – function to call after throttling
- max_calls – maximum number of calls allowed
- interval_in_seconds – size of the sliding window
Submodules
redi.batch module
Functions related to the RediBatch database
-
redi.batch.BATCH_STATUS_COMPLETED= 'Completed'¶ @see #check_input_file()
The first time we run the app there is no SQLite file where to store the md5 sums of the input file. This function creates an empty RediBatch in the SQLite file specified as db_path
@return True if the database file was properly created with an empty table
-
redi.batch.add_batch_entry(db_path, md5)[source]¶ Inserts a row into RediBatch table @see #check_input_file() Parameters ———- db_path : string
The SQLite database file name- md5 : string
- The md5 sum to be inserted
- create_time : string
- The batch start time
-
redi.batch.check_input_file(batch_warning_days, db_path, email_settings, raw_xml_file, project, start_time)[source]
-
redi.batch.get_days_since_today(date_string)[source]¶ @return the number of days passed since the specified date
-
redi.batch.get_md5_input_file(input_file)[source]¶ @see #check_input_file() @see https://docs.python.org/2/library/hashlib.html @see https://docs.python.org/2/library/sqlite3.html#sqlite3.Connection.row_factory
Returns the md5 sum for the redi input file
-
redi.batch.update_batch_entry(db_path, id, status, start_time, end_time)[source]¶ Update the status and the start/end time of a specified batch entry Return True if update succeeded, False otherwise
db_path : string id : integer status : string start_time : datetime string end_time : datetime string
redi.form module
redi.redi module
redi.py - Converter from raw clinical data in XML format to REDCap API data
- Usage:
- redi.py -h | –help redi.py [-v] [-V] [-k] [-e] [-d] [-f=<path>] [-r] [-c=<path>] [-D=<datadir>] [-s] [-b] [-K]
- Options:
-h –help Show this help message and exit -v –verbose Increase output verbosity [default:False] -V –version Show version number [default:False] -k –keep Use this option to preserve the files
generated during execution [default:False]-e –emrdata Use this option to get EMR data [default:False] -d –dryrun To execute redi.py in dry run state. This
is to be able to test each release by doing a dry run, where the data is fetched and processed but not transferred to the production REDCap. Email is also not sent. The processed data is stored as output files under the “out” folder under project root [default:False].-f –file=<filename> Specify the path and filename to use as input for REDI. -r –resume WARNING!!! Resumes the last run. This
switch is for a specific case. Check the documentation before using it. [default:False]-c –config-path=<path> Specify the path to the configuration directory -D –datadir=<datadir> Specify the path to the directory containing
project specific input and output data which will help in running multiple simultaneous instances of redi for different projects- -s –skip-blanks Skip blank events when sending data to REDCap
- [default:False]
- -b –bulk-send-blanks Send blank events in bulk instead of
- individually [default:False]
-K –keep-all Keep all results, do not compress by date
-
class
redi.redi.PersonFormEventsRepository(filename, logger=None)[source]¶ Bases:
objectWrapper for the person-form-events XML file
-
class
redi.redi.SentEvents(filename, writer=None, reader=None)[source]¶ Bases:
objectList of form events that have been sent to REDCap
Parameters: - filename – file location
- writer – delegate called after an event has been marked sent
- reader – function to read previously sent events from disk
-
redi.redi.add_elements_to_tree(data)[source]¶ Add blank elements to fill out in ElementTree.
Add element to data ElementTree for timestamp, redcap form name, eventName, formDateField, and formCompletedFieldName.
Parameters: data – the input ElementTree from the parsed raw XML file.
-
redi.redi.compress_data_using_study_form_date(data)[source]¶ This function is removing duplicate results which were recorded on same date but different times. Warnings:
- we assume that the passed ElementTree is sorted
- we skip all “Canceled” results but we want to keep at least one
- so when all results are canceled we keep the first one
- the passed object is altered
@see #get_key_date() @see #get_key_timestamp() @see #sort_element_tree()
data: the ElementTree object that needs to be compressed return: none
-
redi.redi.configure_logging(data_folder, verbose=False, when='D', interval=1, backup_count=31)[source]¶ Configures the Logger
-
redi.redi.convert_component_id_to_loinc_code(data, component_to_loinc_code_xml_tree)[source]¶ This function converts COMPONENT_ID in raw data to loinc_code based on the mapping provided in the xml file
Parameters: - data – Raw data xml tree
- component_to_loinc_code_xml_tree – COMPONENT_ID to loinc_code mapping xml file tree.
-
redi.redi.convert_none_type_object_to_empty_string(my_object)[source]¶ replace noneType objects with an empty string. Else return the object.
-
redi.redi.copy_data_to_person_form_event_tree(raw_data_tree, person_form_event_tree, form_events_tree)[source]¶ This function copies data from the raw_data_tree to the person_form_event_tree
Parameters: - raw_data_tree – This parameter holds raw data tree
- person_form_event_tree – This parameter holds person form event tree
- form_events_tree – This parameter holds form events tree
-
redi.redi.create_empty_event_tree_for_study(raw_data_tree, all_form_events_tree)[source]¶ This function uses raw_data_tree and all_form_events_tree and creates a person_form_event_tree for study
Parameters: - raw_data_tree – This parameter holds raw data tree
- all_form_events_tree – This parameter holds all form events tree
-
redi.redi.create_empty_events_for_one_subject_helper(form_events_file, translation_table_file)[source]¶ This function creates new copies of the form_events_tree and translation_table_tree and calls create_empty_events_for_one_subject :param form_events_file: This parameter holds the path of form_events file :param translation_table_file: This parameter holds the path of translation_table file
-
redi.redi.get_email_settings(settings)[source]¶ Helper function for grouping email-related properties
-
redi.redi.get_key_date(ele, keep_all_results=False)[source]¶ Helper function for #compress_data_using_study_form_date()
elem: lxml.etree._Element object for which we build a key returns the corresponding quadruple (study_id, form_name, loinc_code, date)
-
redi.redi.get_key_timestamp(ele)[source]¶ Helper function for #sort_element_tree() @see #compress_data_using_study_form_date()
elem: lxml.etree._Element object for which we build a key returns the corresponding quadruple (study_id, form_name, timestamp)
-
redi.redi.get_redcap_settings(settings)[source]¶ Helper function for grouping redcap connection properties
-
redi.redi.load_preproc(preprocessors, root='./')[source]¶ Copied and modified version of load_rules function. TODO: fix load_rules and load_prerules for better parallelism
-
redi.redi.load_rules(rules, root='./')[source]¶ Load custom post-processing rules.
Rules should be added to the configuration file under a property called “rules”, which has key-value pairs mapping a unique rule name to a Python file. Each Python file intended to be used as a rules file should have a run_rules() function which takes one argument.
- Example config.json:
- { “rules”: { “my_rules”: “rules/my_rules.py” } }
- Example rules file:
- def run_rules(data):
- pass
-
redi.redi.main()[source]¶ Data processing steps:
- parse raw XML to ElementTree: “data”
- call read-in function to load xml into ElementTree
- parse formEvents.xml to ElementTree
- call read-in function to load xml into ElementTree
- parse translationTable.xml to ElementTree
- call read-in function to load xml into ElementTree
- add element to data ElementTree for timestamp, redcap form name,
- eventName, formDateField, and formCompletedFieldName
- write out ElementTree as an XML file
- call read-in function to load xml into ElementTree
- update timestamp using collection_date and collection_time
- write redcapForm name to data ElementTree by a lookup of component ID in translationTable.xml
- sort data by: study_id, form name, then timestamp, ascending order
- write formDateField to data ElementTree via lookup of formName in formEvents.xml
- write formCompletedFieldName to data ElementTree via lookup of formName in formEvents.xml
- write eventName to data ElementTree via lookup of formName in formEvents.xml
Example: <formName value=”chemistry”>
<event name=”1_arm_1” /></formName>
- write the Final ElementTree to EAV
-
redi.redi.parse_form_events(form_events_file)[source]¶ Parse the form_events file into an ElementTree
Parameters: form_events_file – the name of the input file (from the json configuration) Returns: ElementTree
-
redi.redi.parse_raw_xml(raw_xml_file)[source]¶ Generate an ElementTree from a raw XML file.
Parameters: raw_xml_file – the input file. Returns: parsed XML data
-
redi.redi.parse_translation_table(translation_table_file)[source]¶ Parse the translationTable.xml into an ElementTree
Parameters: translation_table_file – the name of the input file Returns: ElementTree
-
redi.redi.read_config(config_file, configuration_directory, file_list)[source]¶ Check if files mentioned in configuration files exist
-
redi.redi.replace_fields_in_raw_xml(data, fields_to_replace_xml)[source]¶ replace_fields_in_raw_xml: This function renames all fields which need renaming.Fields which need renaming are read from the xml file. Parameters:
data: Raw data xml tree fields_to_replace_xml: Path to xml file which has list of fields which need renaming.
-
redi.redi.research_id_to_redcap_id_converter(data, redcap_client, research_id_to_redcap_id, configuration_directory)[source]¶ - This function converts the research_id to redcap_id
- prepare a dictionary with [key, value] –> [study_id, redcap_id]
2. replace the element tree study_id with the new redcap_id’s for each bad id, log it as warn.
Example of xml fragment produced:
- <subject lab_id=”999-0001”>
- <NAME>HEMOGLOBIN</NAME> <loinc_code>1534435</loinc_code> <RESULT>1234</RESULT>
- …
- <STUDY_ID>1</STUDY_ID> <!– originally this was “999-0001” –>
</subject>
- Note: The next function which reads the “data” tree
- is #create_empty_event_tree_for_study()
-
redi.redi.setStat(event, translation_table_dict, translation_table_status_field_text_list)[source]¶ Ruchi Vivek Desai, May 13 2014 to assist the updateStatusFieldValueInPersonFormEventTree function
-
redi.redi.sort_element_tree(data, data_folder, keep_all_results)[source]¶ Sort element tree based on three given indices. @see #update_time_stamp()
Keyword argument: data sorting is based on study_id, form name, then timestamp, ascending order
-
redi.redi.updateStatusFieldValueInPersonFormEventTree(person_form_event_tree, translational_table_tree)[source]¶ Ruchi Vivek Desai, May 13 2014 This function updates the status field value with either NOT_DONE (value in the translation table) or empty string based on certain conditions
-
redi.redi.update_data_from_lookup(data, element_to_set_in_data, index_element_in_data, lookup_data, element_to_find_in_lookup_data, index_element_in_lookup_data, value_in_lookup_data, undefined)[source]¶ - Update a single field in an element tree based on a lookup in another
- element tree
Parameters: - data – an element tree with a field that needs to be set
- element_to_set_in_data – element that will be set
- index_element_in_data – element in data that wil be looked up in lookup table where value of element to be set wil be found
- lookup_data – an element tree that contains, the lookup data
- element_to_find_in_lookup_data – parameter for the initial findall in the lookup data
- index_element_in_lookup_data – the element in the lookup data that will be the key in the lookup table
- value_in_lookup_data – element in the lookup data that provides the value in the lookup table
- undefined – a string to be returned for all failed lookups in the lookup table
-
redi.redi.update_event_name(data, lookup_data, undefined)[source]¶ function to update eventName to data ElementTree via lookup of formName in formEvents ElementTree
-
redi.redi.update_form_imported_field(data, lookup_data, undefined)[source]¶ Update the formImportedFieldName value for all subjects
-
redi.redi.update_formcompletedfieldname(data, lookup_data, undefined)[source]¶ function to update formCompletedFieldName in data ElementTree via lookup of formName in formEvents ElementTree
-
redi.redi.update_formdatefield(data, form_events_tree)[source]¶ Write formDateField to data ElementTree via lookup of formName in form_events_tree ElementTree
-
redi.redi.update_recap_form_status(data, lookup_data, undefined)[source]¶ Update the redcapStatusFieldName value to all subjects
-
redi.redi.update_redcap_field_name_value_and_units(data, lookup_data, undefined)[source]¶ function to update redcapFieldNameValue and redcapFieldNameUnits in data ElementTree via lookup of redcapFieldNameValue and redcapFieldNameUnits in translation table tree
-
redi.redi.update_redcap_form(data, lookup_data, undefined)[source]¶ Lookup component ID in translationTable to get the redcapFormName. Write the redcapForm name to data If component lookup fails, sets formName to undefinedForm
-
redi.redi.update_time_stamp(data, input_date_format, output_date_format)[source]¶ Update timestamp using input and output data formats. Warnings:
- we modify the data ElementTree
- we affect the sorting order of data elements @see #sort_element_tree()
-
redi.redi.validate_xml_file_and_extract_data(xmlfilename, xsdfilename)[source]¶ This function is responsible for validating xml file against an xsd and to extract data from xml if validation succeeds
Parameters: - xmlfilename – This parameter holds the path to the xml file
- xsdfilename – This parameter holds the path to the xsd file
redi.redi_lib module
redi.report module
-
class
redi.report.ReportCreator(report_file_path, project_name, redcap_uri, sort_by_lab_id, writer)[source]¶ Bases:
object
-
class
redi.report.ReportEmailSender(settings, logger)[source]¶ Bases:
redi.report.ReportCourier
-
class
redi.report.ReportFileWriter(output_file, logger)[source]¶ Bases:
redi.report.ReportCourier
-
redi.report.updateReportHeader(root, report_parameters)[source]¶ Update the passed root element tree with date, project name and url
redi.upload module
Functions related to uploading data to REDCap
-
redi.upload.create_import_data_json(import_data_dict, event_tree)[source]¶ Convert data from event_tree to json format.
@TODO: evaluate performance @see the caller {@link #redi.upload.generate_output()}
Param: import_data_dict: holds the event tree data Param: event_tree: holds the event tree data Return type: dict :return the json version of the xml data
-
redi.upload.create_redcap_records(import_data)[source]¶ Creates REDCap records from RED-I’s form data, AKA import data.
REDCap API only accepts records for importing. Records are differentiated by their unique record ID, unless the REDCap Project is a Longitudinal study. In that case, they are differentiated by a combination of record ID and an event.
Since RED-I views the world in terms of forms, we have to project our form-centric view into REDCap’s record-centric world. This is done by combining all form data with the same Subject ID and Event Name into the same record.
Parameters: import_data – iterable of 4-tuples: (study_id_key, form_name, event_name, json_data_dict) Returns: iterable of REDCap records ready for upload
-
redi.upload.generate_output(person_tree, redcap_client, rate_limit, sent_events, max_retry_count, skip_blanks=False, bulk_send_blanks=False)[source]¶ Note: This function communicates with the redcap application. Steps:
- loop for each person/form/event element
- generate a csv fragment using create_eav_output
- send csv fragment to REDCap using send_eav_data_to_redcap
@see the caller {@link #redi.redi._run()}
Return type: dictionary Returns: the report_data which is passed to the report rendering function